
Permit Fishing with the Merkin
By Capt. Tom Rowland
The most interesting aspect of the Merkin is that it is truly a fly that changed the sport. Before Del Brown created the Merkin and began to regularly catch some of his 370+ permit on fly, anglers and guides would just take passing shots at the wary fish. Capt. Nat Ragland created a fly called the Puff, which was responsible for a few fish, but not until Browns creation did permit fishing take off. Del Brown, guided by Steve Huff, proved beyond a shadow of a doubt that permit fishing is not only effective, but also a worthy way to spend the day. The two routinely caught permit, came in with world records and days that they caught numerous fish. At the time, these statistics were staggering because the number of anglers who had caught a single permit on fly was amazingly low. Pioneering flies and techniques for permit, the pair created quite a stir in the Keys and elsewhere. We can all thank Del Brown for the sport we now know as permit fishing with a fly. Early
in permit flyfishing history, the permit was pursued with bonefish techniques.
The most accepted method of bonefishing is to lead the fish and let the fly sink
to the bottom. When the bonefish is close enough to the fly to see it, strip the
fly to resemble escaping prey. This tactic has resulted in a fair number
of permit caught, but usually spooks the fish. The more accepted technique
is to try to get the permit to see the fly fall to the bottom. Blue
crabs and others will travel on or near the surface, inhabit floating weeds or
weed lines. At the first sign of danger, they will shoot to the bottom at
about a 30-degree angle. Once there, crabs often rely on their camouflage
to protect them from predators. If a permit sees a blue crab shoot to the
bottom, the fish will pounce on the crab as if it was the last morsel of food
on the flat. Permit eat many different foods, but crabs are responsible
for the majority of their diet while on the flats. Mimicking this behavior
by casting close to the fish and letting the fly sink to the bottom and remain
motionless like a natural crab is my preferred way to fish. If the fish
doesnt see the fly fall, I will instruct my clients to "bump" the fly or strip
it once to try to get the attention of the permit. If the fish sees this,
there is still a good chance that it will take the fly if the angler lets the
fly lay motionless on the bottom.
Early
in permit flyfishing history, the permit was pursued with bonefish techniques.
The most accepted method of bonefishing is to lead the fish and let the fly sink
to the bottom. When the bonefish is close enough to the fly to see it, strip the
fly to resemble escaping prey. This tactic has resulted in a fair number
of permit caught, but usually spooks the fish. The more accepted technique
is to try to get the permit to see the fly fall to the bottom. Blue
crabs and others will travel on or near the surface, inhabit floating weeds or
weed lines. At the first sign of danger, they will shoot to the bottom at
about a 30-degree angle. Once there, crabs often rely on their camouflage
to protect them from predators. If a permit sees a blue crab shoot to the
bottom, the fish will pounce on the crab as if it was the last morsel of food
on the flat. Permit eat many different foods, but crabs are responsible
for the majority of their diet while on the flats. Mimicking this behavior
by casting close to the fish and letting the fly sink to the bottom and remain
motionless like a natural crab is my preferred way to fish. If the fish
doesnt see the fly fall, I will instruct my clients to "bump" the fly or strip
it once to try to get the attention of the permit. If the fish sees this,
there is still a good chance that it will take the fly if the angler lets the
fly lay motionless on the bottom.
Weather plays an important role in the success of permit anglers. The ideal day for permit is not the ideal day for other fish. I like 18-25 mph winds with a crystal clear sky. Higher winds allow me to pole the boat to within 30 feet of a tailing permit and the high sun gives us the visibility to track a fish from 100yards away. Spotting a fish at such a great distance and beginning the stalk is the epitome of sporting challenge. Poling in heavy wind seems effortless when we are watching a 30 pound fish tail repeatedly along the flat. As I approach the fish, my angler gets ready to make the difficult cast. Timing is everything in this situation. Casting too early is the most common mistake that my anglers make. With the high winds, cut your estimated distance in half and wait for your guide to tell you when begin the cast. The boat position is equally as important as the cast and windy days make it exceedingly difficult to set up the shot. A good guide will pole into position and tell you to begin your cast. At that moment, he will slowly swing the boat to allow a clear casting path while remaining in position to chase the permit if necessary. When the cast is made, watch the reaction of the fish. A well-presented fly will get the fishes attention, while a cast too far away from the fish will go unnoticed. I tell all my anglers that I would rather see them spook the fish by casting too close to the fish than having them never see it. Tremendous amounts of fish are spooked as the angler tries to recast a short cast.
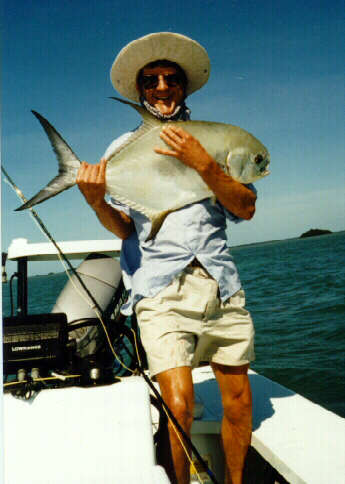
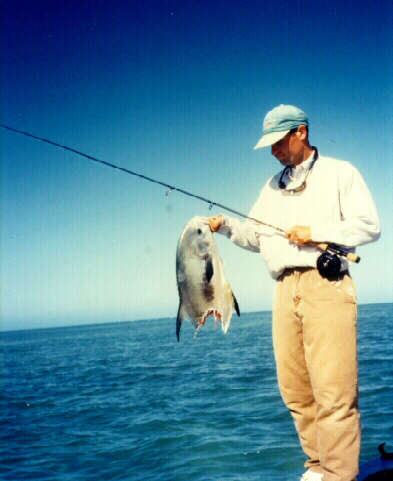
If all goes well, the permit will rush over to your fly, tail up on it and ease off. Your line will come tight and you will be hooked to the most prized fish on earth. It sounds easy; it is not. While not easy, it is certainly not impossible and permit are caught on fly regularly. When an angler achieves the confidence that a permit will eat every fly that is thrown to them properly, that angler will begin to catch a lot of permit. Achieving such a high level of confidence is developed through long hours chasing permit. I can not think of a better way to spend the day.
 In
order to attempt permit fishing with a fly, anglers need to go to a destination
that has large numbers of fish frequenting the flats. A good guide who specializes
in flyfishing for permit is probably the best investment that you will make in
pursuit of these fish. Fishing out of Key West, Florida offers the permit
angler access to the best permit fishing on earth. The Lower Florida Keys,
from Marathon to the Marquesas Keys have a dense population of permit and a vast
diversity of situations to fish for them. During different times of the
year, I concentrate my efforts for permit in all of the Lower Keys, but tend to
fish for them most out of Key West. I consider the permit to be the most
"year round" specie to frequent the flats. A little heartier than the bonefish,
the permit can adjust to both colder and warmer temperatures while remaining active
in shallow water. I will flyfish for permit every month of the year, but
tend to give the months of February, March, July, September, October, and November
the highest grades as to numbers of fish on the flats. There is simply no
fishing that gets me as excited as flyfishing for permit. I would rather
guide for permit than any other fish because no other guiding that I have done
requires as much teamwork between the angler and the guide.
In
order to attempt permit fishing with a fly, anglers need to go to a destination
that has large numbers of fish frequenting the flats. A good guide who specializes
in flyfishing for permit is probably the best investment that you will make in
pursuit of these fish. Fishing out of Key West, Florida offers the permit
angler access to the best permit fishing on earth. The Lower Florida Keys,
from Marathon to the Marquesas Keys have a dense population of permit and a vast
diversity of situations to fish for them. During different times of the
year, I concentrate my efforts for permit in all of the Lower Keys, but tend to
fish for them most out of Key West. I consider the permit to be the most
"year round" specie to frequent the flats. A little heartier than the bonefish,
the permit can adjust to both colder and warmer temperatures while remaining active
in shallow water. I will flyfish for permit every month of the year, but
tend to give the months of February, March, July, September, October, and November
the highest grades as to numbers of fish on the flats. There is simply no
fishing that gets me as excited as flyfishing for permit. I would rather
guide for permit than any other fish because no other guiding that I have done
requires as much teamwork between the angler and the guide.
Key West offers the best accommodations in the Keys and most of my anglers choose to stay on the island. There are accommodations for every budget and taste from the chain type hotels to elegant guest houses to five star resorts. Generally I give a few recommendations of some of my favorite places and my anglers may choose which one is best suited to their vacation. Key West also plays a great host to any non-fishing companions with its museums, shops and fabulous cuisine.
Tying the Merkin
| Materials: | |
| Hook: | 1 - 2/0. I really like the Gamakatsu Wide Gap hook but I will also tie on the Mustad 34007 and the 7766 occasionally. |
| Thread: | Flat waxed nylon. |
| Color: | Chartreuse, yellow or blue. |
| Tail: | Wide, webby hackles of tarpon quality. I try to match the tail to the body of the fly by using brown/grizzly, olive/grizzly, tan, Cree, or gray hackles. I place a small bunch of marabou between the feathers and incorporate a VERY small amount of flash to match the feathers. |
| Body: | Rug yarn. Some people use "sparkle yarn" but I prefer to use the smaller diameter yarn very similar to carpet yarn. |
| Color: | Tan, brown, olive, gray. I also have been experimenting with other synthetic materials such as Sea Fibers, Widows Web, and Body Dub in the same colors. |
| Legs: | The original fly calls for white rubber legs with red tips. With the advent of so many leg choices, the tyer can be creative. I incorporate Zebra Legs and Sili-Legs in various colors to my Merkins as well as the original white rubber legs. |
| Eyes: | I weight the flies to the situations that I plan to fish. Most of my flies have the 3/16 eyes on them but I tie flies with the 7/32 and the 5/32. I prefer chromed eyes without eyes painted on them, but will use black or natural lead eyes. |
| Weed guard: | Optional -- I use 20 pound Mason Hard monofilament. |
Tying Instructions
Start by running your thread from the eye to the tie in point and completely cover the hook shank. Return to the eye and tie in the eyes by making figure 8 turns with your thread and finish by wrapping around the base of the eyes with turns parallel to the hook shank. This will build a nice support for the eyes and prevent "roll-over". Make sure to leave enough room for the weed guard if you choose to install one. Return the thread to the rear of the hook shank. Begin the tail with a small clump of marabou to match the rest of the fly. I prefer my tails a little longer than normal using about a 1-½ inch piece to make most of them. Tie this in on the top of the hook shank. Tie in about 3-4 strands of flashabou or other matching flash material on top of the marabou. Now select your hackles and pair them. I use 2-3 hackles per side. Splay the hackles like a tarpon fly so that the feathers curve naturally outward.Begin the body by cutting yarn into lengths of 2 inches. The original Merkin calls for alternating bands of brown and tan yarn, but I like to be creative with both color and amount of each color in the fly. If I want an overall lighter colored fly, I might use a few more pieces of tan yarn than brown. To create the Merkins body, tie in a single piece of the yarn crossways to the hook. Secure the yarn in the middle with figure 8 turns. Tie the next piece in as close as possible and secure with figure 8s. Continue tying in yarn pieces until you reach the eyes. If you would like to install a weed guard you can do that now. Cut a 3-inch piece of Mason 20-pound monofilament. With pliers, flatten one end for a more secure tie-in. Just behind the eye, tie in the weed guard and wrap around the mono so that it extends almost straight up. Cut the weed guard to extend just beyond the hook point. Whip finish the fly.
 You
have created something that will look nothing like the finished product.
Similar to tying spun deer hair flies, we will now trim the fly to shape.
Very carefully begin at the eye and trim backwards. I trim extremely small
amounts at a time. We want the fly to end up looking like a teardrop or
the shape of a Colorado Spinner blade. Trim a little at a time tapering
from the front of the fly to the rear. At the rear, taper to the tear drop
shape. The fly should be very narrow at the eye and get progressively bigger
towards the tail. This shape is EXTREMELY important. If you use a
round or other shaped Merkin, it will not sink properly and the fish is likely
not to eat it or even see it. We are trying to get the fly to fall quickly
at a 30 to 45 degree angle to the bottom.
You
have created something that will look nothing like the finished product.
Similar to tying spun deer hair flies, we will now trim the fly to shape.
Very carefully begin at the eye and trim backwards. I trim extremely small
amounts at a time. We want the fly to end up looking like a teardrop or
the shape of a Colorado Spinner blade. Trim a little at a time tapering
from the front of the fly to the rear. At the rear, taper to the tear drop
shape. The fly should be very narrow at the eye and get progressively bigger
towards the tail. This shape is EXTREMELY important. If you use a
round or other shaped Merkin, it will not sink properly and the fish is likely
not to eat it or even see it. We are trying to get the fly to fall quickly
at a 30 to 45 degree angle to the bottom.
When you are happy with the shape, you can now install the rubber legs. If you choose to use white with red tips, a neat trick is to take the package of rubber legs and cut the entire strand the length that you desire. While the legs are still held together, use an indelible marker to color the tips of the entire strand of rubber on both the top and bottom. Somehow you will get full coverage and you will have lots of legs the right size and already colored. Simply thread the leg through the body and tie it in a single overhand. I have never had one of these come off and it looks better than tying a granny knot on the legs. Tie in 3-4 legs throughout the body.
You may have noticed that I did not call for any glue or head cement on this fly. Permit are very difficult to catch because they have an incredible sense of smell and I dont want to take a chance of them smelling any glue on the fly. Incidentally, be very careful with sunscreen and bug repellent. A tiny bit of sunscreen on the fly will ruin any chance you might have had to catch a Permit.
Click on the photos above to view full-size. Remember to use your browser's "back" button to return.
![]() Please Visit Capt.
Tom Rowland's Web site:
Please Visit Capt.
Tom Rowland's Web site:
Big Blue Flyfishing Home Page.
![]() Additionally,
you can contact Capt. Tom Rowland at:
Additionally,
you can contact Capt. Tom Rowland at:
![]() Back to Flyfishing Articles
Back to Flyfishing Articles
Questions and comments: Please use our Contact Form.